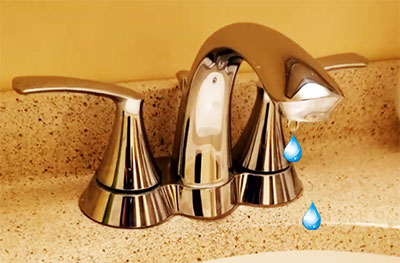
 There’s nothing more annoying than the constant dripping from a leaky bathroom faucet. In this how-to tutorial, I will walk you through all the steps needed to finally repair that old leaky faucet, whether it’s in your bathroom or even your kitchen.
In this guide you’ll learn what tools you’ll need as well as where you can buy faucet replacement seals or cartridges.
In my Faucet Repair I’ll be working on a Moen Darcy 4 in. Centerset 2-HandleBathroom Faucet Model #84550SRN.
Step 1 Identifying If the Drip is coming from the Hot or Cold Side
This is a simply process, if your faucet is dripping steadily like mine, you can simply put your hand underneath the faucet nozzle and feel the temperature of the drip.
Alternatively, you can shut off the Hot water supply line and see if the drip has stopped. If the drip has not stopped, next shut off your cold supply line. Shutting off one supply line at a time will help you identify which side of the faucet you will need rubber seals or replacement cartridges for.
Step 2 Finding out the Model # of your Faucet in order to identify replacement parts
 As seen in my How-to Video below, I already have the model # for my exact Moen Bathroom Faucet. But, let me tell you how you can figure out what faucet you have in case you don’t know what model # your faucet is.
There are a few options to identifying the model # of your dripping faucet.
You can do a Google Image Search using a good description of the faucet in question.
For my particular Moen faucet I did a Google Image Search using “Chrome Moen 2 Handle Faucet”.
This method requires you to look through several photos of similar faucets until you identify an image that exactly or closely resembles your installed faucet.
After you find the image that matches your exact faucet, you then click on the image to find the model #. Hopefully you’ll find Amazon, Lowes, or Home Depot links which will make it very easy to get your faucet model #.
Alternatively, you can proceed with he disassembly of your faucet to visually identify the actual faucet replacement parts you’ll need to buy.
Let’s move on to how I took my faucet apart.
Step 3 Taking Your Leaky Faucet Apart
 First we have to shut off the Hot & Cold Supply Lines to the faucet. Open your bathroom cabinet and locate the hot and cold supply lines. Shut off both sides, then verify that water no longer pours out of the faucet.
Now we have to take the actual faucet apart.
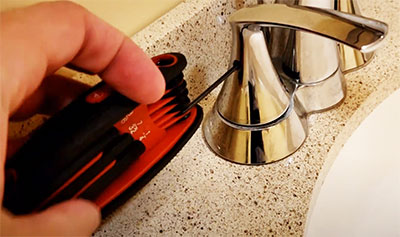
Most of these faucets have an allen screw on each handle body that has to be unfastened in order for you to lift the handle off.
Make sure you use the correct allen wrench or screwdriver to release the set screw, You don’t want to risk stripping the screw and make the situation worse. I bought myself a folding metric and standard allen wrench tool like this one.
https://amzn.to/3k3rjY5
By the way if your faucet handle is neither an allen wrench, Philips or flathead screw, you might be dealing with a Torx screw, but no worries, you can still buy a folding multi-tool to do the job.
Step 4 Remove Brass Ring Holding Faucet Cartridge in Place
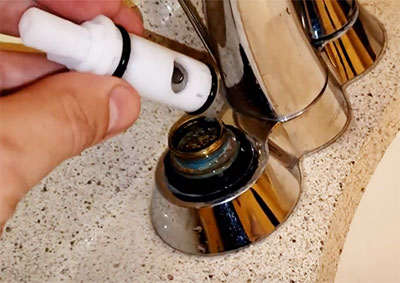
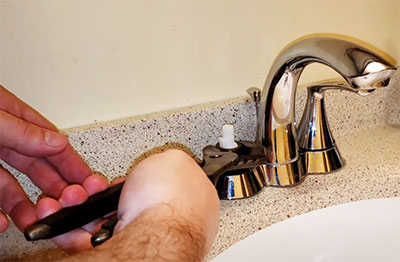
 Once you remove the faucet handle you will be looking at a brass ring that will have to be unfastened using vise grips. Once you remove that brass ring, use pliers to pull upwards gently on the faucet cartridge.
If your faucet does not use replacement cartridges because it’s a much older faucet design, you will have to continue disassembly until you find worn out rubber seals. At that point you will have measure and find replacement seals at your local hardware store like Home Depot or Lowes. You can also most likely find replacement rubber seals on Amazon by typing in the search field the rubber seal dimensions.
If you didn’t find the model # of your faucet but you did reveal a cartridge which will be either plastic or brass. Remove the cartridge and go to your local hardware store to find a replacement. Alternatively you can do an Amazon search for the replacement cartridge by providing as much relevant details about it as possible.
For my faucet I would type in Moen 2 handle bathroom faucet replacement cartridge. Then I would look through all the amazon results until I find the exact match for my part. If Amazon does not carry that cartridge you can do the same search on Google Images, Lowes, or Home Depot websites.
Step 5 Finishing Your Dripping Faucet Repair Job
Replacing the faucet cartridge on a modern faucet is not that hard of a job. Before you begin, look through these instructions once more and watch my How-to video below. With the right tools and the replacement parts in hand, you should be able to fix your dripping faucet in less than 20 minutes. This was my first time repairing a faucet. I've installed plenty of kitchen and bathroom faucets when I ran my remodeling company and at my own house during my remodel. Fixing a leaky faucet is actually much easier than installing a new faucet. If you were thinking of doing that instead, I highly suggest you only do it if you really hate the current faucet you have or you cannot find replacement parts to fix the drip.

